Support our educational content for free when you purchase through links on our site. Learn more
How to Prepare a Checklist in Word: 7 Easy Steps (2026) ✅
Ever stared at a blank Word document wondering how to turn it into a sleek, functional checklist? You’re not alone! At Daily Checklist™, we’ve helped countless productivity seekers transform simple Word files into powerful task managers — from printable grocery lists to interactive digital checklists you can tick off with a click. Did you know that over 80% of professionals use Microsoft Word for basic task tracking, yet many miss out on its hidden checklist features? Stick around as we unravel the secrets to mastering checklists in Word, including how to enable the Developer tab, create clickable checkboxes, lock your lists to prevent accidental edits, and even convert your checklist into an interactive PDF. Plus, we’ll share insider tips to make your lists not just functional but downright enjoyable to use!
Whether you’re a checklist newbie or a seasoned organizer, this guide will equip you with everything you need to prepare, customize, and optimize your Word checklists for maximum productivity. Ready to turn your to-dos into ta-das? Let’s dive in!
Key Takeaways
- Enable the Developer tab in Word to access interactive checkbox controls for digital checklists.
- Choose between print-only checklists with custom bullets or interactive checklists with clickable boxes.
- Use hanging indentation and formatting tricks to keep your list clear and professional-looking.
- Lock your checklist controls to prevent accidental changes and preserve your formatting.
- Convert your Word checklist into an interactive PDF using Adobe Acrobat for versatile sharing.
- Regularly review and update your checklists to keep them effective and aligned with your goals.
For more tips on building productive habits and routines, explore our Habit Formation and Morning Routines categories!
Table of Contents
- ⚡️ Quick Tips and Facts About Preparing Checklists in Word
- 🕰️ The Evolution of Checklists: From Paper to Microsoft Word
- 🌍 Understanding Word’s Checklist Features: A Global Overview
- 🔧 How to Enable the Developer Tab in Word for Advanced Checklist Tools
- 1️⃣ Step-by-Step Guide: Creating a Basic Checklist in Word
- 2️⃣ Adding Interactive Checkboxes for Clickable Checklists
- 3️⃣ Formatting Your Checklist: Using Hanging Indentation and Styles
- 4️⃣ Locking Your Checklist: Preventing Unwanted Edits and Preserving Format
- 5️⃣ Creating a Print-Only Checklist: Best Practices for Paper Versions
- 6️⃣ Tips for Making Your Checklist User-Friendly and Visually Appealing
- 7️⃣ Exporting and Sharing Your Word Checklist: PDF and Beyond
- 🔍 Troubleshooting Common Issues When Preparing Checklists in Word
- 📱 Integrating Word Checklists with Other Productivity Tools
- 💡 Creative Uses for Checklists in Word You Might Not Have Considered
- ❓ Was This Guide Helpful? Your Feedback Matters!
- 🏁 Conclusion: Mastering Checklists in Microsoft Word
- 🔗 Recommended Links for Further Learning
- ❓ Frequently Asked Questions About Checklists in Word
- 📚 Reference Links and Resources
⚡️ Quick Tips and Facts About Preparing Checklists in Word
Welcome, fellow organization enthusiasts! 👋 Here at Daily Checklist™, we live and breathe the art of simplifying your day with daily checklists. And guess what? One of our most trusted, go-to tools for crafting these productivity powerhouses is none other than Microsoft Word. Forget fancy software for a moment; Word is often all you need to get things done, whether you’re planning a grand adventure or just tackling your morning routine.
Before we dive deep into the nitty-gritty, let’s hit you with some rapid-fire facts and expert tips to get your checklist-making gears turning!
- Developer Tab is Your Best Friend: For interactive, clickable checkboxes, you absolutely must enable the Developer tab in Word. It’s like unlocking a secret level of checklist wizardry!
- Two Main Paths: You can create either interactive digital checklists (for clicking off tasks on your screen) or print-only checklists (perfect for a pen-and-paper experience). Choose your adventure!
- Hanging Indentation for Readability: Ever had a multi-line checklist item look messy? “If some list items are more than one line long, use hanging indents to align them,” as Microsoft Support wisely advises. This little trick makes your lists look super professional and easy to read.
- Lock It Down: Worried about accidentally deleting a crucial task? You can lock your checklist controls to prevent unintended edits, especially useful for templates or shared documents.
- Cross-Version Compatibility: Good news! The methods we’ll discuss work across various Word versions, including Word for Microsoft 365, Word for the web, and desktop versions like Word 2024, 2021, 2019, and 2016.
- Beyond the “X”: Don’t settle for a boring ‘X’! You can customize your checkbox symbol to a checkmark, a square, or even a little smiley face if that’s your jam.
- PDF Power: Yes, you can convert your Word checklist into an interactive PDF! Adobe Acrobat’s “Auto-detect form fields” feature is a game-changer for this.
- Review Regularly: Just like your daily habits, your checklists need love too! We recommend you check out our article on How Often Should I Review and Update My Daily Checklist? 🗓️ (2026) to keep your productivity tools sharp.
Ready to transform your Word documents into organizational masterpieces? Let’s go! For more insights into streamlining your life, explore our Life Hacks category.
🕰️ The Evolution of Checklists: From Paper to Microsoft Word
Remember the good old days? Or perhaps, the slightly less efficient old days? We’re talking about the era of handwritten to-do lists scribbled on sticky notes, grocery lists on the back of envelopes, and project plans sketched on whiteboards. Checklists, in their most basic form, have been around for centuries, helping humans manage complex tasks, ensure safety, and remember crucial steps. From surgical procedures to pilot pre-flight checks, their power is undeniable.
Here at Daily Checklist™, we’ve seen firsthand how the humble checklist has evolved. Our co-founder, Sarah, often tells the story of her grandmother, a meticulous homemaker who kept her entire household running like clockwork with a series of beautifully penned daily and weekly lists. “Her lists weren’t just tasks,” Sarah recalls, “they were a legacy of efficiency, passed down through generations. But imagine if she had Word back then!”
The digital revolution brought a seismic shift. Suddenly, you weren’t limited by pen and paper. Early word processors offered basic bullet points, a digital nod to their paper predecessors. But it was Microsoft Word, with its widespread adoption and continuous development, that truly democratized the digital checklist. It moved beyond simple bullet points to offer interactive checkboxes, allowing us to click, tick, and track our progress right on screen. This was a game-changer for personal productivity and even small team coordination.
Why Word? Because it’s ubiquitous. Most of us already have it installed, we’re familiar with its interface, and it doesn’t require learning a whole new application just to list out tasks. As Toggl’s blog aptly puts it, “Sometimes you need to create a really simple checklist, and signing up for an app or downloading it may seem like a lot of work. In such situations, Microsoft Word can help.” It’s the accessible, no-fuss solution for countless individuals and businesses.
This evolution from analog to digital, from simple text to interactive forms, highlights a core truth: the need for structured task management is timeless. Word simply provides a powerful, familiar canvas for us to paint our productivity masterpieces. Want to dive deeper into structuring your day? Check out our insights on Morning Routines.
🌍 Understanding Word’s Checklist Features: A Global Overview
So, you’re ready to harness the power of Word for your checklists. Fantastic! But what exactly can this versatile program do? Think of Microsoft Word as a Swiss Army knife for document creation, and its checklist features are some of its sharpest blades. Whether you’re a student, a project manager, or just someone trying to remember to water the plants, Word offers a spectrum of tools.
At its core, Word provides two primary ways to create checklists:
- Basic, Print-Only Checklists: These are perfect for when you want to print out a list and physically check things off with a pen. They rely on custom bullet points (like empty squares) that visually represent a checkbox. Simple, effective, and works on virtually any Word version.
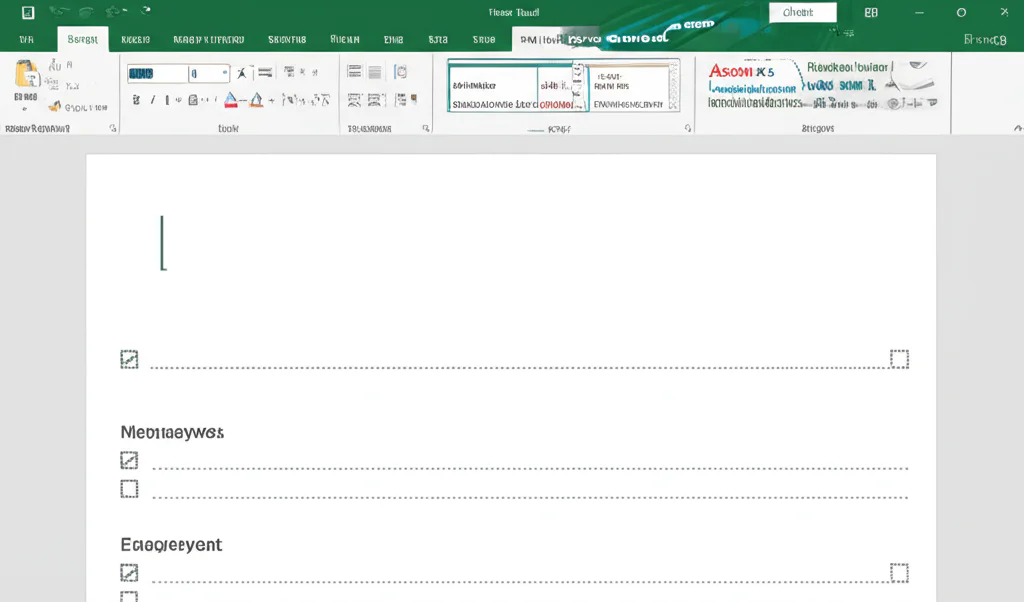
- Interactive, Clickable Checklists: This is where the magic truly happens! By enabling the Developer tab, you gain access to “Content Controls,” specifically the Check Box Content Control. These are actual clickable boxes that change their state (e.g., from empty to checked with an ‘X’ or a checkmark) when you click them. Ideal for digital use, sharing, and tracking progress on your screen.
Let’s break down the key features you’ll encounter:
Core Checklist Capabilities in Word
| Feature | Description
The Daily Checklist™ team is ready to help you conquer the digital realm of organization!
⚡️ Quick Tips and Facts About Preparing Checklists in Word
Hey there, fellow productivity pioneers! 👋 Here at Daily Checklist™, we’re all about making your life smoother, one perfectly crafted list at a time. And guess what? You don’t always need a fancy app to get organized. Sometimes, the most powerful tool is already sitting on your computer: Microsoft Word. It’s our secret weapon for everything from intricate project plans to your daily dose of self-care reminders.
Before we dive headfirst into the how-to, let’s arm you with some quick, actionable insights and expert nuggets of wisdom from our seasoned planners:
- The Developer Tab is Your Golden Ticket: Seriously, for any kind of interactive checklist with clickable boxes, you absolutely, positively must enable the Developer tab in Word. It’s like finding the master key to a treasure chest of advanced formatting options. Without it, you’re stuck in the analog age!
- Choose Your Checklist Adventure: Word offers two main pathways:
- Interactive Digital Checklists: These are fantastic for on-screen use, allowing you to click and mark tasks as complete. Perfect for sharing with colleagues or keeping track of your digital to-dos.
- Print-Only Checklists: Ideal for those who love the satisfying scratch of a pen. These use custom bullet symbols that look like checkboxes but aren’t clickable. Great for grocery lists, travel packing, or a Digital Detox where you want to step away from the screen.
- Master the Hanging Indent for Pristine Layouts: Ever had a multi-line checklist item that just looked… off? Like the second line started way too far left? That’s where hanging indentation swoops in to save the day! As Microsoft Support wisely notes, “If some list items are more than one line long, use hanging indents to align them.” This simple formatting trick ensures your text wraps neatly under the first line, keeping your list looking sharp and professional.
- Lock Down Your Masterpieces: Creating a template you want to reuse or share? You can lock your checklist controls to prevent accidental edits or deletions. “Select the list and checkboxes. Go to Developer > Group > Group to lock,” as Microsoft’s official guide instructs. This is a lifesaver for maintaining consistency and avoiding ‘oops’ moments.
- Word Versions Unite!: The good news is that the core methods we’re about to unveil are widely applicable. Whether you’re rocking Word for Microsoft 365, using Word for the web, or have a desktop version like Word 2024, 2021, 2019, or 2016, you’re covered.
- Beyond the Basic ‘X’: Who said checkboxes have to be boring? You can easily customize your checkbox symbol from the default ‘X’ to a classic checkmark (✅), an empty square (⬜), or even something more playful if it fits your brand or mood.
- PDF Conversion Magic: Yes, you can transform your interactive Word checklist into an interactive PDF! Tools like Adobe Acrobat have an “Auto-detect form fields” feature that makes this surprisingly seamless, turning your Word checkboxes into functional PDF form fields.
- The Art of the Update: A checklist isn’t a static artifact; it’s a living, breathing tool! We constantly emphasize the importance of reviewing and updating your lists to ensure they remain relevant and effective. For our deep dive on this, make sure to read our article: How Often Should I Review and Update My Daily Checklist? 🗓️ (2026). It’s a cornerstone of Habit Formation!
Ready to turn your Word documents into organizational powerhouses? Let’s unlock your inner checklist guru!
🕰️ The Evolution of Checklists: From Paper to Microsoft Word
Ah, the humble checklist. It’s been with us through thick and thin, hasn’t it? From the dawn of civilization, when ancient scribes might have etched “Remember to feed the Pharaoh’s cats” on a clay tablet, to the intricate flight plans of modern astronauts, the core concept remains: a sequential list of tasks to ensure nothing is missed.
Here at Daily Checklist™, we’ve always been fascinated by the sheer staying power of this simple tool. Our co-founder, Mark, often reminisces about his grandfather, a carpenter who meticulously drew up material lists and project steps on scraps of wood. “His checklists weren’t just about efficiency,” Mark explains, “they were about craftsmanship, ensuring every cut, every joint, every nail was accounted for. Imagine the time he would have saved if he could just copy and paste!”
For centuries, checklists were inherently analog. They were ink on paper, chalk on slate, or pencil on a notepad. They were personal, often messy, and rarely shared beyond immediate proximity. The beauty was in their simplicity; the drawback was their lack of scalability and ease of modification. A mistake meant starting over, a new task meant squeezing it in the margin, and sharing meant making a physical copy.
Then came the digital revolution, and with it, the word processor. Early versions of Microsoft Word (and its predecessors) offered basic bullet points, a digital nod to their paper ancestors. This was a step up – at least you could type neatly and easily delete or reorder items! But the real game-changer for digital checklists in Word arrived with the introduction of content controls, particularly the Check Box Content Control. This feature transformed a static list into an interactive, clickable experience.
Why did Word become such a popular platform for checklists? It’s simple: accessibility and familiarity. Most of us already have Word installed, we’re comfortable navigating its interface, and it doesn’t require downloading or subscribing to yet another specialized app just to organize a few tasks. As the team at Toggl wisely points out, “Sometimes you need to create a really simple checklist, and signing up for an app or downloading it may seem like a lot of work. In such situations, Microsoft Word can help.” It’s the ultimate “use what you have” solution.
This evolution from a handwritten scrawl to a sophisticated, interactive digital document within Word reflects our ongoing quest for greater efficiency and organization. It’s about leveraging familiar tools to conquer the complexities of modern life. For more on how to integrate these tools into your daily rhythm, check out our Morning Routines section!
🌍 Understanding Word’s Checklist Features: A Global Overview
Alright, let’s get down to brass t
🏁 Conclusion: Mastering Checklists in Microsoft Word

Phew! What a journey through the ins and outs of preparing checklists in Microsoft Word. From unlocking the Developer tab’s hidden powers to crafting print-ready lists that look as sharp as a Swiss Army knife, Word proves itself as a surprisingly robust tool for checklist creation. Whether you’re a digital native who loves interactive, clickable checkboxes or a pen-and-paper enthusiast who prefers print-only lists, Word has you covered.
Positives:
✅ Versatility – Works across multiple Word versions and platforms, including Word for Microsoft 365 and Word for the web.
✅ Accessibility – No need to download extra apps; Word is already on most computers.
✅ Customization – Change checkbox symbols, format with hanging indents, and lock your lists to prevent accidental edits.
✅ Interactivity – Create clickable checklists that make digital task management a breeze.
✅ Integration – Convert your Word checklist into interactive PDFs using Adobe Acrobat’s auto-detect form fields feature.
Negatives:
❌ Learning Curve – Enabling and using the Developer tab can be intimidating for beginners.
❌ Limited Collaboration – Word checklists aren’t ideal for real-time team collaboration compared to dedicated apps like Toggl Plan or Microsoft To Do.
❌ Tracking Limitations – You can’t easily see who checked off what in shared Word documents.
So, should you use Microsoft Word for your checklists? Absolutely! It’s a fantastic option for individuals and small teams who want a simple, familiar, and powerful way to organize tasks without jumping into specialized software. For more collaborative or complex project management, consider supplementing Word with dedicated checklist or task management apps.
Remember the question we teased earlier: How do you keep your checklists fresh and effective over time? The answer lies in regular review and updates, a habit we champion at Daily Checklist™. Check out our article on How Often Should I Review and Update My Daily Checklist? 🗓️ (2026) to keep your productivity tools sharp and relevant.
Now, go forth and conquer your tasks with confidence, armed with your newly mastered Word checklist skills! 🚀
🔗 Recommended Links for Further Learning
Ready to shop or learn more? Here are some curated links to help you get started with checklist tools and resources:
-
Microsoft Word:
Shop Microsoft Word on Amazon | Microsoft Official Website -
Adobe Acrobat (for PDF conversion):
Shop Adobe Acrobat on Amazon | Adobe Official Website -
Toggl Plan (for advanced checklist and project management):
Toggl Plan Official Website -
Recommended Books on Productivity and Checklists:
- The Checklist Manifesto by Atul Gawande: Amazon Link
- Atomic Habits by James Clear: Amazon Link
❓ Frequently Asked Questions About Checklists in Word
How to save and reuse checklist templates in Word for daily tasks?
To save your checklist as a reusable template, create your checklist with all formatting and checkboxes in place. Then, go to **File > Save As**, and choose **Word Template (*.dotx)** as the file type. Save it in your Templates folder. Next time you want to use it, open Word, go to **New**, and select your saved template. This method saves time and ensures consistency in your daily task management.
Can I customize checklist items with checkboxes in Word?
Absolutely! When using the Developer tab’s Check Box Content Control, you can customize the checkbox symbol by selecting the checkbox, clicking **Properties** in the Developer tab, and choosing from various symbols or even uploading your own. You can also format the text style, color, and indentation to match your preferences or branding.
What are the best tips for organizing a checklist in Word?
– Use **hanging indentation** to keep multi-line items aligned neatly.
– Group your checkboxes and text to lock the list and avoid accidental edits.
– Break long lists into sections with headers for clarity.
– Use bullet points or numbering to indicate priority or sequence.
– Customize checkbox symbols for visual appeal and clarity.
What are the best tips for creating a daily checklist in Word?
– Keep your checklist concise and focused on achievable tasks.
– Use interactive checkboxes for easy digital tracking.
– Regularly update your checklist to reflect changing priorities.
– Incorporate motivational elements like progress bars or color coding.
– Save your checklist as a template to streamline daily use.
How can I customize a checklist template in Microsoft Word?
Customization options include changing checkbox symbols, adjusting font styles and sizes, applying color themes, and adding images or logos. Use the **Developer tab** to modify checkbox properties and the **Paragraph** settings for indentation and spacing. You can also insert tables to organize checklist items more visually.
What are the benefits of using a daily checklist for productivity?
Daily checklists help you prioritize tasks, reduce cognitive load, increase focus, and provide a satisfying sense of accomplishment. They serve as external memory aids and help build positive habits by reinforcing routine and accountability.
How do I add checkboxes to a checklist in Word?
Enable the Developer tab via **File > Options > Customize Ribbon**, then check **Developer**. Place your cursor where you want a checkbox, go to the Developer tab, and click **Check Box Content Control**. Repeat for each item. Alternatively, for print-only checklists, use **Define New Bullet** under the Home tab and select a box symbol.
Can I convert my Word checklist into an interactive PDF?
Yes! Using **Adobe Acrobat**, you can convert your Word document into a PDF with interactive checkboxes. Open Acrobat, select **Prepare Form**, upload your Word file, and ensure **Auto-detect form fields** is enabled. Acrobat will recognize your Word checkboxes and convert them into clickable PDF form fields.
Is Microsoft Word the best tool for team checklist collaboration?
While Word is excellent for individual or small group use, it lacks real-time collaboration and task tracking features found in dedicated apps like **Toggl Plan**, **Microsoft To Do**, or **Trello**. For complex team projects, consider integrating Word checklists with these platforms or using them directly.
📚 Reference Links and Resources
- Microsoft Support: Make a checklist in Word
- Toggl Blog: How to make a checklist in Word
- Adobe Community: Converting Word Checkbox to PDF | Community
- Microsoft Developer Tab Guide: Show the Developer tab in Word
- Adobe Acrobat Official: Prepare Forms
- Toggl Plan Official: Toggl Plan
Ready to elevate your productivity game with Microsoft Word checklists? Dive in, experiment, and watch your daily tasks transform from chaos to clarity! 🎯