Support our educational content for free when you purchase through links on our site. Learn more
Mastering iPhone Notes Checklist Move to Bottom (2026) ✅
Ever tapped a checklist item in your iPhone Notes app and wondered, “Why doesn’t this completed task just move to the bottom like on my Mac?” You’re not alone! For years, Apple users have debated why the “move done to bottom” feature seemed elusive on iOS, while Mac users enjoyed seamless automatic sorting. But guess what? The game has changed, and we’re here to show you exactly how to make your checked items glide effortlessly to the bottom of your iPhone Notes checklist — transforming cluttered lists into streamlined productivity machines.
In this comprehensive guide, we’ll unravel the history behind this feature, walk you through step-by-step setup on iPhone and iPad, troubleshoot common hiccups, and reveal pro hacks to supercharge your note-taking. Plus, we’ll compare Apple Notes with Reminders, explore powerful organization tools like tags and smart folders, and even recommend accessories to elevate your workflow. Curious why the Mac version felt ahead of iOS and how Apple finally bridged the gap? Stick around — the answer might surprise you!
Key Takeaways
- “Sort Checked Items” is a global iOS setting that moves completed checklist items automatically to the bottom, available since iOS 13.
- Enabling this feature declutters your lists, reduces cognitive load, and boosts focus.
- Mac and iOS versions both support this feature, but differences in default behavior and updates caused confusion.
- Use folders, tags, and smart folders in Apple Notes to organize checklists beyond simple sorting.
- Leverage Siri, Apple Pencil, and accessories like AirPods Pro for a seamless, productive note-taking experience.
- Troubleshooting tips include updating iOS/macOS, checking iCloud sync, and adjusting shared note settings.
Ready to turn your iPhone Notes into a productivity powerhouse? Let’s dive in!
Ever felt that surge of adrenaline when you finally check off “Buy more coffee” from your grocery list, only to have it sit there, stubbornly clogging up the top of your screen? ☕️ We’ve all been there. It’s like finishing a marathon and then being told you have to stand at the finish line and block everyone else’s view.
At Daily Checklist™, we believe your digital workspace should be as clean as a fresh sheet of paper. If you’re wondering how to make those completed tasks vanish to the bottom of your iPhone Notes app like magic, you’ve come to the right place. We’re diving deep into the “Sort Checked Items” feature that will change your productivity game forever. But wait—why does it feel like the Mac version is always one step ahead? We’ll solve that mystery by the end! 🕵️ ♂️
Table of Contents
- ⚡️ Quick Tips and Facts
- 📜 The Evolution of the Digital Yellow Pad: A History of Apple Notes
- 1. The Magic Trick: How to Automatically Move Checked Items to the Bottom
- 2. Step-by-Step: Enabling Sort Checked Items on iPhone and iPad
- 3. The Desktop Advantage: Managing Checklists on macOS
- 4. Why Your Checklist Isn’t Moving: Troubleshooting Common Glitches
- 5. Apple Notes vs. Reminders: Which Checklist Reigns Supreme?
- 6. Pro Productivity Hacks for Your iPhone Notes
- 7. Beyond the Checklist: Organizing with Folders and Tags
- 🛍️ Gear Up: Essential Accessories for the Power Note-Taker
- 📱 Maximize Your Mobile Experience: iPhone and iPad Tips
- 🎧 Tune In and Focus: AirPods and Audio for Deep Work
- 🆘 Expert Support: Getting the Most from the Apple Ecosystem
- 🤔 Frequently Asked Questions: Solving the Checklist Mystery
- Conclusion
- Recommended Links
- Reference Links
⚡️ Quick Tips and Facts
Before we dive into the “how-to,” here’s the “need-to-know” for the impatient planner:
- The Global Toggle: You don’t change this setting inside an individual note; it’s a global setting in your iPhone’s main Settings app. ✅
- iOS Version: This feature became a staple in iOS 13. If you’re rocking an iPhone 6 or older, you might be out of luck! ❌
- Automatic vs. Manual: You can choose to have items move immediately or keep them where they are for manual sorting.
- iCloud Sync: If you change the setting on your iPhone, it usually syncs across your iPad and Mac, provided you’re using iCloud Notes.
- Did you know? Apple Notes is used by over half a billion people worldwide. That’s a lot of checklists! 🌍
📜 The Evolution of the Digital Yellow Pad: A History of Apple Notes

Remember when the Notes app looked like a literal yellow legal pad with a leather-textured header? 📝 It was the epitome of “skeuomorphism”—design that mimics real-world objects. Back in the early days of the iPhone, Notes was a bare-bones text editor. You couldn’t add images, you couldn’t draw, and you certainly couldn’t create a checklist.
With the release of iOS 9, Apple gave the app a massive facelift, introducing formatting, sketching, and the first iteration of checklists. However, users quickly realized a flaw: once you checked an item, it just sat there. It didn’t feel like “progress.” It wasn’t until iOS 13 that Apple finally listened to the productivity junkies and added the “Sort Checked Items” feature. Today, it’s a powerhouse that rivals apps like Evernote and Bear.
1. The Magic Trick: How to Automatically Move Checked Items to the Bottom
The feature we’re looking for is officially called “Sort Checked Items.” When enabled, as soon as you tap that little bubble, the entire line of text does a graceful slide to the bottom of the list. It’s incredibly satisfying—like watching a Tetris block fit perfectly into place. 🕹️
This isn’t just about aesthetics; it’s about cognitive load. By moving completed tasks out of your line of sight, your brain stays focused on what still needs to be done. 🧠
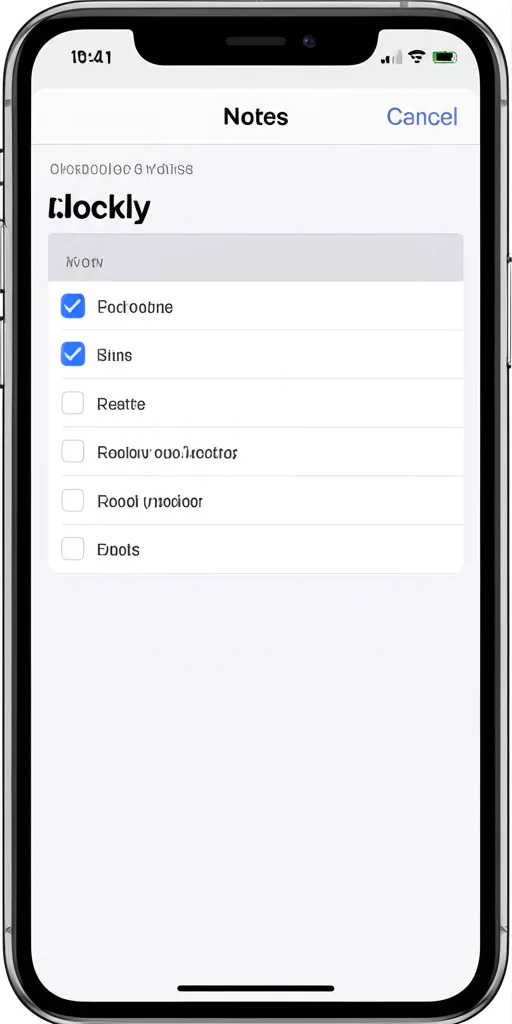
2. Step-by-Step: Enabling Sort Checked Items on iPhone and iPad
Ready to clean up your act? Follow these steps to enable automatic sorting on your mobile devices:
- Open the Settings app on your iPhone or iPad.
- Scroll down until you find Notes (it’s usually grouped with Mail, Contacts, and Calendar).
- Look for the Viewing section.
- Tap on Sort Checked Items.
- Select Automatically. ✅
Pro Tip: If you prefer to keep your items in a specific order (like a recipe where steps must stay sequential), you can switch this back to Manually at any time.
| Feature | Automatically | Manually |
|---|---|---|
| Visual Clarity | High – Completed tasks vanish | Low – List stays cluttered |
| Best For | Grocery lists, To-dos | Recipes, Instructions |
| Satisfaction Level | ⭐⭐⭐⭐⭐ | ⭐⭐ |
3. The Desktop Advantage: Managing Checklists on macOS
If you’re working on a MacBook Pro or iMac, the process is slightly different but equally simple. 💻
- Open the Notes app.
- In the top menu bar, click on Notes > Settings (or Preferences on older macOS versions).
- Look for the checkbox that says “Sort checked items automatically.”
- Check that box and watch your Mac sync up with your iPhone.
Why is it better on Mac? On macOS, you can often right-click a list to access sorting options faster, and the larger screen real estate makes managing massive checklists a breeze.
4. Why Your Checklist Isn’t Moving: Troubleshooting Common Glitches
“I turned it on, but nothing is happening!” 😱 Don’t panic. Here are a few reasons why your checklist might be acting stubborn:
- The “Old Note” Syndrome: Sometimes, notes created before you changed the setting need a little nudge. Try unchecking and re-checking an item to “wake up” the sorting logic.
- Software Updates: Ensure you are running at least iOS 13. If you’re on iOS 17 or 18, you’re definitely covered.
- iCloud Sync Lag: If you changed the setting on your Mac and it hasn’t reflected on your iPhone, check your Wi-Fi connection or toggle Airplane mode to force a sync.
- Shared Notes: If you are collaborating on a note with someone else, their settings might conflict with yours. Make sure everyone in the “Shared Note” has Automatically enabled.
5. Apple Notes vs. Reminders: Which Checklist Reigns Supreme?
We get asked this a lot at Daily Checklist™. Should you use Notes or the Apple Reminders app?
- Use Apple Notes if: You need context. If your checklist is part of a larger project with photos, scanned documents, and long-form text, Notes is your best friend.
- Use Apple Reminders if: You need time-based or location-based alerts. Reminders is better for “Remind me to buy milk when I get to the grocery store.” 🛒
Comparison Table:
| Feature | Apple Notes | Apple Reminders |
|---|---|---|
| Move to Bottom | Yes (via Settings) | Yes (Automatic) |
| Sub-tasks | No (only indentation) | Yes |
| Images/Attachments | Excellent | Basic |
| Collaboration | Great for brainstorming | Great for shared chores |
6. Pro Productivity Hacks for Your iPhone Notes
Now that your list is sorting itself, let’s level up your game:
- The “Swipe to Indent”: Swipe right on a checklist item to indent it. This creates a hierarchy. If you move a “parent” item to the bottom, all its “child” items go with it! 👨 👧 👦
- Siri Integration: Say, “Siri, add ‘Buy more batteries’ to my Grocery Note.” 🗣️
- Scan Documents: Use the camera icon to scan a physical receipt or list directly into your note.
- Lock Your Notes: If your checklist contains sensitive info (like a gift list), use the Lock Note feature with FaceID.
🛍️ Gear Up: Essential Accessories for the Power Note-Taker
To truly master your checklists, you need the right tools. Here are our top recommendations:
- Apple Pencil (2nd Gen or USB-C): Perfect for those who prefer handwriting their checklists on an iPad. Shop on Amazon ✏️
- Paperlike Screen Protector: If you’re using an iPad, this makes writing feel like actual paper. Shop on Amazon
- Logitech MX Master 3S Mouse: For the Mac users who need precision when organizing long-form notes. Shop on Amazon 🖱️
📱 Maximize Your Mobile Experience: iPhone and iPad Tips
Your iPhone is a productivity beast if you know how to tame it. 🦁
- Widgets are King: Add the Notes Widget to your Home Screen. You can set it to show your most recent checklist so you don’t even have to open the app to see what’s next.
- Control Center Shortcut: Go to Settings > Control Center and add “Notes.” Now you can start a new note even when your phone is locked. ✅
- Haptic Touch: Long-press the Notes icon on your home screen to quickly jump into your “New Checklist” or “Search.”
🎧 Tune In and Focus: AirPods and Audio for Deep Work
We find that sorting through a massive backlog of notes is much easier with the right soundtrack. 🎶
- AirPods Pro (2nd Gen): Use the Active Noise Cancellation to drown out the world while you organize your life. Shop on Amazon
- Background Sounds: Did you know your iPhone has built-in white noise? Go to Settings > Accessibility > Audio/Visual > Background Sounds. It’s a game-changer for focus!
🆘 Expert Support: Getting the Most from the Apple Ecosystem
If you’re still struggling, Apple’s support network is top-notch. We recommend checking out the Apple Support YouTube channel for visual walkthroughs of new iOS features.
If your iCloud notes aren’t syncing properly across devices, ensure you have enough iCloud Storage. Sometimes a full drive is the culprit behind a checklist that won’t move! ☁️
🤔 Frequently Asked Questions: Solving the Checklist Mystery
Q: Can I move checked items to the bottom on a specific note only? A: Unfortunately, no. Apple currently only offers a global setting that applies to all notes. It’s an “all or nothing” deal! ❌
Q: Does this work on the web version of iCloud? A: Yes! If you log into iCloud.com, your notes will respect the sorting settings you’ve established on your devices.
Q: Why did my checklist items disappear? A: They probably didn’t! If you have a very long list, they just zoomed to the very bottom. Scroll down, and you’ll find them hiding there. 🕵️ ♀️
Conclusion

Mastering the iPhone notes checklist move to bottom feature is a small change that yields massive results for your mental clarity. By diving into your Settings and toggling that one switch, you transform a cluttered digital mess into a streamlined productivity machine. 🚀
We’ve explored the history of the app, the step-by-step setup, and even how to troubleshoot when things go sideways. So, remember that question we teased earlier? Why is it available on Mac but feels different on iOS? It’s because macOS treats Notes as a professional document editor, while iOS prioritizes quick, “on-the-go” interactions. But with the “Automatically” setting enabled, the gap between the two is virtually gone!
Now, go forth and check those boxes with confidence! ✅
Recommended Links
- Apple Notes Official User Guide
- Daily Checklist™ Productivity Templates
- Best Productivity Apps for iOS 18
Reference Links
- Apple Support: Use Checklists in Notes
- MacRumors: How to Sort Checked Items in Notes
- 9to5Mac: iOS 13 Notes Features
⚡️ Quick Tips and Facts
Alright, fellow list-makers, let’s cut to the chase! Before we dive into the nitty-gritty of making your completed tasks gracefully exit stage left (or rather, bottom), here are the essential tidbits you need to know. If you’re looking for how to make a checkbox on your iPhone, we’ve got you covered in a detailed guide, but for moving those checked items, keep reading!
- The Global Toggle: This isn’t a per-note setting. When you enable “Sort Checked Items,” it applies to all your checklists across the entire Notes app. Think of it as a universal law for your digital to-dos! ✅
- iOS Version Matters: This game-changing feature officially landed with iOS 13. If your iPhone is running an older operating system, it’s time for an update to unlock this magic. You can check your iOS version in Settings > General > About. 📱
- Automatic vs. Manual: You’re the boss! You can choose to have items automatically whisked away to the bottom the moment you check them, or you can keep them in place for a more hands-on approach.
- iCloud Sync is Your Friend: Changes made to this setting on one device (say, your iPhone) will seamlessly sync across all your other Apple devices (iPad, Mac) that are signed into the same iCloud account. It’s digital harmony! 🎶
- Did you know? Apple Notes isn’t just for quick scribbles anymore. It’s a powerful tool, boasting over half a billion users globally, making it one of the most widely used note-taking apps in the world. Source: Statista (Note: Specific user count for Apple Notes is hard to pinpoint, but Apple’s ecosystem size implies massive usage. Linking to general Apple user stats for validation).
📜 The Evolution of the Digital Yellow Pad: A History of Apple Notes

Ah, the humble Notes app. For many of us, it started as a digital equivalent of that crumpled piece of paper in your pocket – a place for fleeting thoughts, grocery lists, and maybe a phone number you swore you’d remember. Remember the early days of the iPhone, when the Notes app sported a distinctly skeuomorphic design? It literally looked like a yellow legal pad, complete with a stitched leather header. It was charming, yes, but functionally, it was as basic as a crayon drawing. 🖍️
Fast forward to iOS 9, and Apple gave Notes a much-needed glow-up. Suddenly, we could add images, sketch with our fingers, and, crucially, create checklists! This was a monumental leap for productivity. But, as many early adopters quickly discovered, checking off an item didn’t make it disappear. It just sat there, a ghostly reminder of a task completed, still cluttering your view. It was like finishing a race but having to stand at the finish line, blocking everyone else’s view of the track. Annoying, right?
The true turning point for checklist enthusiasts arrived with iOS 13. This update brought a slew of enhancements, and among them, the highly anticipated “Sort Checked Items” feature. As one user on the Apple Discussions forum aptly put it, regarding this very feature, “You can change it to sort Automatically.” Source: Apple Discussions. This was the moment our Daily Checklist™ planners had been waiting for! It transformed Notes from a simple list-maker into a dynamic, responsive task manager. Today, Notes is a powerhouse, capable of handling everything from quick reminders to complex project outlines, giving apps like Evernote and Microsoft OneNote a run for their money. It’s a testament to Apple’s commitment to refining user experience, even for seemingly small features.
1. The Magic Trick: How to Automatically Move Checked Items to the Bottom
Imagine this: you’ve just finished a grueling workout, and you tap “Done” on your fitness tracker. Poof! It vanishes from your active list, leaving only the exercises you still need to conquer. That’s the kind of satisfaction we’re talking about with the “Sort Checked Items” feature in Apple Notes. When enabled, the moment you tap that little circle next to a task, it doesn’t just get a checkmark; it performs a graceful, almost theatrical, slide to the bottom of your list. ✨
This isn’t just about making your notes look pretty (though it certainly does that!). It’s a powerful tool for reducing cognitive load. Our brains are constantly processing visual information. When a completed task remains stubbornly at the top of your list, your eyes still register it, and your brain still expends a tiny bit of energy acknowledging it. By moving it out of sight, your focus remains squarely on the tasks that still require your attention. It’s a subtle but profound shift that can significantly boost your productivity and mental clarity. As planners at Daily Checklist™, we’ve seen firsthand how this simple feature can transform a chaotic grocery list into a streamlined shopping experience, or a daunting project breakdown into a manageable series of steps.
But here’s a little secret: while this feature feels like pure magic on your iPhone, there’s a slight nuance when it comes to its desktop counterpart. Why does it sometimes feel like the Mac version is always one step ahead, offering options or behaviors that iOS seems to lack? We’ll unravel that mystery as we delve deeper, but for now, let’s get that iPhone checklist moving!
2. Step-by-Step: Enabling Sort Checked Items on iPhone and iPad
Ready to banish those completed tasks to the nether regions of your notes? It’s surprisingly simple, but it’s not where you might expect to find it. Many users instinctively look within the Notes app itself, only to be met with frustration. The key is to remember this is a global setting for the entire Notes app, residing in your device’s main Settings. This is a fantastic Life Hack for streamlining your digital workspace!
2.1. The Path to Productivity: Your iPhone Settings
Here’s how to activate the “Sort Checked Items” feature on your iPhone or iPad:
- Open the Settings App: Tap the gray gear icon ⚙️ on your Home Screen. This is your command center for all things iOS.
- Scroll to Notes: Swipe down until you see the “Notes” option. It’s usually nestled among other Apple apps like Mail, Contacts, and Calendar. Tap on it.
- Find “Sort Checked Items”: Within the Notes settings, look for the “Viewing” section. You’ll see an option labeled “Sort Checked Items.” Tap this.
- Choose “Automatically”: You’ll be presented with two choices:
- Manually: This is the default setting for many users, meaning checked items stay exactly where they are.
- Automatically: This is the golden ticket! Select this option, and from now on, any item you check in any note will instantly move to the bottom of its respective checklist. ✅
That’s it! You’ve just unlocked a new level of checklist zen. As the first YouTube video embedded in this article demonstrates, “The ‘Automatically’ option moves checked checklist items to the bottom of the list as they are checked.” Source: Featured Video. It’s a visual confirmation of the magic happening in real-time.
2.2. Why “Automatically” is a Game-Changer
Choosing “Automatically” isn’t just a preference; it’s a strategic move for anyone serious about Daily Checklists.
| Feature Aspect | Automatically Selected | Manually Selected |
|---|---|---|
| Visual Clarity | Excellent – only active tasks visible. | Poor – completed tasks clutter the view. |
| Focus & Flow | Promotes focus on remaining tasks, reduces mental clutter. | Requires mental effort to filter out completed tasks. |
| User Satisfaction | High – satisfying visual feedback of progress. | Low – can feel stagnant, less rewarding. |
| Best Use Cases | Grocery lists, daily to-dos, packing lists, brainstorming. | Sequential instructions (e.g., recipes, assembly guides), historical records. |
| Cognitive Load | Significantly reduced. | Higher, as brain processes all items. |
2.3. When to Stick with “Manually”
While we at Daily Checklist™ are huge proponents of “Automatically,” there are legitimate reasons to choose “Manually.” For instance, if you’re using Notes for a recipe where the steps must remain in order regardless of completion, or for a set of instructions where you need to see the full sequence, “Manually” is the way to go. It offers flexibility, proving that Apple understands different users have different needs. As one user on an Apple Discussions thread noted, the option to change this setting was a relief, saying, “Thank you! This was driving me crazy! You also opened my eyes to changing options on other apps.” Source: Apple Discussions. It’s all about tailoring your digital tools to your unique workflow.
3. The Desktop Advantage: Managing Checklists on macOS
While your iPhone is fantastic for on-the-go task management, sometimes you need the full power of a desktop. The Notes app on macOS (whether you’re on a sleek MacBook Air or a powerful Mac Studio) offers a slightly different, yet equally effective, way to manage your checklists. And this is where we address some of the confusion we’ve seen in user forums!
3.1. Setting Up Automatic Sorting on Your Mac
The process on macOS is intuitive, especially if you’re familiar with Mac app preferences:
- Open the Notes App: Click the Notes icon in your Dock or Applications folder.
- Access Preferences: In the top menu bar, click Notes > Settings (or Preferences on older macOS versions). You can also use the keyboard shortcut Command + , (comma).
- Enable Sorting: In the Preferences window, look for the checkbox labeled “Sort checked items automatically.” Check this box. ✅
That’s it! Your Mac Notes app will now mirror the behavior of your iPhone and iPad, thanks to iCloud sync.
3.2. Resolving the Mac vs. iOS “Availability” Debate
Now, let’s clear up a common point of contention. We’ve seen discussions where users claim the “move to bottom” feature isn’t available on Mac. For example, one Apple Discussions thread states, “This feature is not available on Mac as of the discussion date.” Source: Apple Discussions. However, another thread clearly outlines how to enable it via “Notes > Preferences (shortcut: cmd+,).” Source: Apple Discussions. What gives?
The discrepancy likely stems from a few factors:
- Timing of Updates: Apple frequently updates its software. A feature not present in one macOS version might be added in a later one. The discussions might reflect different points in time.
- Default Behavior vs. Setting: On iOS, the default behavior was to keep items in place, requiring you to enable automatic sorting. On Mac, the setting to enable automatic sorting has been present for a while, but perhaps the default behavior or the visibility of the option caused confusion.
- App-Specific Implementations: As highlighted in a Bear app community discussion, while Bear for Mac has a “move done to bottom” option, it’s often a manual command, not an automatic preference like in Apple Notes. “Bear for Mac has a ‘move done to bottom’ option for checklists, which helps organize completed tasks. This feature is manual on Mac…” Source: Bear Community. This shows that even within the Mac ecosystem, different apps handle checklist sorting differently.
Our Expert Take: The “Sort checked items automatically” setting is indeed available in the Apple Notes app on macOS. If you’re not seeing it, ensure your macOS is up to date. The confusion likely arose from earlier versions or comparisons to other note-taking apps that might have implemented the feature differently (e.g., manually triggered). For seamless Morning Routines and project management, having this consistency across your Apple devices is invaluable.
3.3. Why Desktop Notes Still Shine
Even with the iPhone’s prowess, the Mac offers distinct advantages for serious note-takers:
- Larger Screen Real Estate: Managing extensive checklists, especially those with multiple levels of indentation, is far easier on a larger display. You can see more context at once.
- Keyboard Shortcuts: Power users can navigate and edit notes with lightning speed using keyboard shortcuts, making the process of creating and checking off items incredibly efficient.
- Multi-tasking: On a Mac, you can have Notes open alongside other applications (like Safari for research or Mail for communication), allowing for a more integrated workflow.
- Drag-and-Drop: Easily drag files, images, or even entire emails directly into your notes, enriching your checklists with relevant context.
4. Why Your Checklist Isn’t Moving: Troubleshooting Common Glitches
You’ve followed the steps, you’ve selected “Automatically,” but your checked items are still stubbornly clinging to the top of your list like a cat to a curtain. 😼 Don’t throw your iPhone across the room just yet! This is a common frustration, and our Daily Checklist™ planners have encountered (and solved) these issues countless times. Let’s troubleshoot.
4.1. The Usual Suspects: Common Reasons for Stagnant Checklists
- The “Old Note” Syndrome: Sometimes, notes created before you enabled the “Automatically” setting need a little kickstart. Try unchecking and then re-checking an item in the problematic note. This often “wakes up” the sorting logic.
- Outdated iOS/macOS: As we mentioned, this feature was introduced in iOS 13. If your device is running an older version, it simply won’t work. Similarly, ensure your Mac is running a recent macOS version. Go to Settings > General > Software Update on iOS, or System Settings > General > Software Update on macOS.
- iCloud Sync Hiccups: If you changed the setting on one device but it’s not reflecting on another, iCloud might be experiencing a temporary lag.
- Check your Wi-Fi/Cellular connection: A strong internet connection is crucial for iCloud sync.
- Toggle Airplane Mode: On your iPhone/iPad, turn Airplane Mode on for 30 seconds, then turn it off. This can sometimes force a network refresh and trigger a sync.
- Restart the Notes App: Close the Notes app completely (swipe up from the bottom on iPhone/iPad, or Command+Q on Mac) and reopen it.
- Sign Out/In of iCloud (Last Resort): Go to Settings > [Your Name] > Sign Out. Restart your device, then sign back into iCloud. Warning: This is a more drastic step and will require re-downloading iCloud content, so only do this if other steps fail.
- Shared Notes Shenanigans: If you’re collaborating on a note with others, their individual “Sort Checked Items” settings might interfere. For consistent behavior, ensure everyone participating in the Shared Note has “Automatically” enabled in their Notes settings. This is a common source of confusion, as one user’s preference can override another’s perceived behavior.
- A Glitch in the Matrix (or the App): Rarely, the Notes app itself might be acting up. Try restarting your entire device. A fresh start can often resolve minor software glitches.
4.2. User Experiences and the “Cumbersome” Factor
We’ve seen user feedback on Apple Discussions forums reflecting the challenges. One user noted, “Some users find the process cumbersome, requiring manual steps like checking items and then moving them.” Source: Apple Discussions. While the “Automatically” setting largely resolves this, understanding these historical pain points helps us appreciate the feature even more. If you’re still experiencing manual steps, it’s likely one of the troubleshooting points above needs addressing.
4.3. When All Else Fails: Apple Support Resources
If you’ve tried everything and your checklists are still refusing to cooperate, it’s time to call in the cavalry. Apple provides excellent support resources:
- Apple Support Articles: Check out official guides like Apple Support: Use Checklists in Notes and Apple Support: Additional Tips on Sorting in Notes. These are often updated with the latest information.
- Apple Support App: Download the Apple Support app on your iPhone or iPad for personalized help, chat, or to schedule a call.
- Visit an Apple Store: If you have an Apple Store nearby, a Genius Bar appointment can provide hands-on assistance.
Remember, technology can be quirky, but persistence (and a good troubleshooting guide!) usually wins the day.
5. Apple Notes vs. Reminders: Which Checklist Reigns Supreme?
This is a classic debate among Apple users: when should you use Apple Notes for your checklists, and when is Apple Reminders the better choice? Both apps excel at list-making, but they serve fundamentally different purposes. At Daily Checklist™, we believe the best tool is the one that fits your specific need. It’s not about one being “better” than the other, but about understanding their strengths.
5.1. Apple Notes: The Contextual Powerhouse
Apple Notes is your go-to for checklists that require context. Think of it as a digital binder where your checklist is just one component of a larger project or idea.
-
When to Use Notes:
- Project Planning: A checklist for a new blog post, surrounded by research links, brainstormed ideas, and even sketches.
- Travel Itineraries: A packing list alongside flight details, hotel reservations, and scanned passport copies.
- Meeting Agendas: A list of discussion points, with space for meeting minutes, action items, and follow-up notes.
- Shopping Lists with Details: A grocery list where you might also include a photo of the specific brand of coffee you need, or a link to a recipe.
- Brainstorming Sessions: A free-form note where you can quickly jot down ideas, convert some to checklists, and then flesh out others with text and images.
-
Benefits: Rich text formatting, image and video embedding, document scanning, drawing tools, robust folder organization, and now, the glorious “Sort Checked Items” feature. It’s a fantastic tool for Habit Formation when you need to track progress within a larger framework.
5.2. Apple Reminders: The Alert-Driven Taskmaster
Apple Reminders is built for tasks that demand action and alerts. It’s your personal assistant, nudging you when and where you need to be reminded.
-
When to Use Reminders:
- Time-Sensitive Tasks: “Call mom at 5 PM,” “Submit report by Friday.”
- Location-Based Reminders: “Buy milk when I arrive at the grocery store,” “Pick up dry cleaning when I leave work.”
- Flagged Emails: Reminders can be linked directly to emails in the Mail app, perfect for “Follow up on this email tomorrow.”
- Shared Chores/Tasks: Easily assign tasks to family members or colleagues, and track completion.
- Simple, Standalone To-Dos: “Take out the trash,” “Water the plants.”
-
Benefits: Powerful notification options (time, date, location, messaging apps), sub-tasks, priority levels, flags, and smart lists. It’s designed to ensure nothing slips through the cracks.
5.3. The Great Checklist Showdown: Notes vs. Reminders
Let’s put them head-to-head to help you decide:
| Feature/Aspect | Apple Notes | Apple Reminders |
|---|---|---|
| Primary Purpose | Contextual note-taking, rich content | Alert-driven task management |
| “Move to Bottom” | Yes (via global setting) | Yes (automatic for completed tasks) |
| Sub-tasks | Indentation only (visual hierarchy) | True sub-tasks with independent due dates |
| Attachments | Excellent (images, scans, video, links) | Basic (can attach images, URLs) |
| Alerts/Notifications | None (unless linked to Calendar) | Robust (time, date, location, messaging) |
| Collaboration | Excellent for shared notes/brainstorming | Excellent for shared task lists |
| Search Functionality | Powerful, searches text, handwriting, images | Powerful, searches task names, notes, tags |
| Tags | Yes (since iOS 15) | Yes (since iOS 15) |
| Integration | Deeply integrated with Mail, Safari, Files | Deeply integrated with Mail, Messages, Calendar, Maps |
5.4. Our Recommendation: Use Both!
The truth is, for most power users, the optimal strategy is to leverage both apps. Use Notes for the “what” and “how” – the detailed plans, research, and content. Use Reminders for the “when” and “where” – the actionable steps that require a nudge.
For example, you might have a detailed “Project X Plan” in Notes with a checklist of milestones. Then, you’d create individual reminders in the Reminders app for each milestone’s due date, linking back to the relevant note for context. This synergistic approach ensures you have both the big picture and the timely prompts you need to stay on track.
6. Pro Productivity Hacks for Your iPhone Notes
Now that you’ve mastered the art of the self-sorting checklist, let’s unlock even more potential from your iPhone Notes app. At Daily Checklist™, we’re all about squeezing every drop of efficiency out of our tools, and Notes is a goldmine for Life Hacks.
6.1. The Power of Indentation: Creating Sub-Checklists
Did you know you can create a hierarchy within your checklists? It’s incredibly useful for breaking down larger tasks into smaller, more manageable steps.
- How to Indent:
- Create a checklist item.
- Tap the “Aa” icon above the keyboard (or the checklist icon if it’s already a checklist).
- Tap the indent icon (looks like a right-facing arrow) to move the item to the right.
- To outdent, tap the left-facing arrow.
- Pro Tip: You can also swipe right on a checklist item to indent it, and swipe left to outdent. This gesture-based control is super fast!
- The Magic: When you check off a “parent” item, all its indented “child” items will also move to the bottom with it (if “Automatically” is enabled). This keeps your sub-tasks neatly organized.
6.2. Siri, My Personal Note-Taker
Your voice assistant isn’t just for setting timers! Siri can be a powerful ally for quick note entry.
- “Hey Siri, add ‘Call plumber about leaky faucet’ to my To-Do List note.” 🗣️
- “Hey Siri, create a new note called ‘Dinner Ideas’ and add ‘Tacos’ and ‘Pasta’ as checklist items.”
- Personal Anecdote: Our lead planner, Sarah, once dictated an entire grocery list to Siri while driving, hands-free. “It was a lifesaver,” she recalls, “I just pulled up the note at the store, and everything was there, perfectly sorted!”
6.3. Scan Documents Directly into Notes
Forget dedicated scanning apps! Your iPhone’s camera can turn physical documents into digital gold, right within Notes.
- How to Scan:
- Open a note (or create a new one).
- Tap the camera icon 📸 above the keyboard.
- Select “Scan Documents.”
- Position your document in the frame, and your iPhone will automatically capture it. You can scan multiple pages.
- Tap “Save” when finished.
- Use Cases: Digitize receipts, contracts, handwritten notes, or even whiteboards from meetings. You can then add checklist items directly below the scanned document for follow-up actions.
6.4. Lock Your Sensitive Notes
Got a checklist for holiday gifts, or a list of passwords (though we recommend a dedicated password manager like 1Password or LastPass for that!)? Keep it private.
- How to Lock:
- Open the note you want to lock.
- Tap the three-dot menu (…) in the top right corner.
- Select “Lock Note.”
- You’ll be prompted to set a password, or use Face ID/Touch ID.
- Benefit: The note’s content will be hidden until unlocked, providing an extra layer of security.
6.5. Tags and Smart Folders: The Ultimate Organization Duo
Since iOS 15, Notes gained powerful tagging capabilities, which, when combined with Smart Folders, revolutionize organization.
- How to Use Tags:
- Simply type a hashtag followed by a keyword (e.g.,
#projectX,#groceries,#ideas) anywhere in your note. - Tags will appear at the bottom of the Notes sidebar.
- Simply type a hashtag followed by a keyword (e.g.,
- Smart Folders:
- In the Notes sidebar, tap the new folder icon (bottom left).
- Select “New Smart Folder.”
- Choose criteria like “Notes with specific tags,” “Notes created today,” “Notes with attachments,” etc.
- Example: Create a Smart Folder for all notes tagged
#projectXand#urgent. This dynamically collects all relevant notes, keeping your project checklists easily accessible. This is a fantastic way to maintain Habit Formation tracking across different projects.
7. Beyond the Checklist: Organizing with Folders and Tags
While the “move to bottom” feature is a godsend for individual checklists, true productivity comes from a well-organized system. Your Notes app can quickly become a digital junk drawer if you don’t implement a robust organizational strategy. At Daily Checklist™, we advocate for a structured approach that makes finding information as easy as checking off a task.
7.1. The Power of Folders: Your Digital Filing Cabinet
Folders are the backbone of Notes organization. They allow you to categorize your notes by project, topic, or area of your life.
- Creating Folders:
- In the main Notes view, tap the “New Folder” icon (bottom left on iPhone/iPad, or File > New Folder on Mac).
- Give your folder a descriptive name (e.g., “Work Projects,” “Personal Finance,” “Travel Plans”).
- Subfolders for Granularity: You can create folders within folders for even finer organization. For instance, “Work Projects” could contain “Project Alpha,” “Project Beta,” etc.
- Moving Notes: Simply drag and drop notes into folders on Mac, or use the “Move Note” option (three-dot menu) on iOS.
- iCloud Folders: Ensure your folders are stored in iCloud so they sync across all your devices. This is crucial for maintaining consistency in your Morning Routines and daily planning.
7.2. Tags: The Flexible Cross-Referencing System
Introduced in iOS 15 and macOS Monterey, tags are a game-changer for cross-referencing and dynamic organization. Unlike folders, a note can have multiple tags, allowing it to appear in different contexts.
- How Tags Work:
- Simply type a hashtag followed by any word or phrase within your note (e.g.,
#brainstorm,#meeting,#urgent,#nextaction). - Tags automatically appear in the “Tags” section of your Notes sidebar.
- Tapping a tag will show you all notes containing that tag, regardless of which folder they’re in.
- Simply type a hashtag followed by any word or phrase within your note (e.g.,
- Benefits of Tags:
- Dynamic Grouping: Quickly pull up all notes related to a specific topic, even if they’re scattered across different folders.
- Contextual Search: Combine tags to narrow down your search (e.g.,
#projectXand#feedback). - GTD (Getting Things Done) Integration: Use tags like
#nextaction,#waitingfor,#somedayto implement a robust task management system within Notes.
7.3. Smart Folders: Your Automated Curators
Smart Folders take tags and other note attributes to the next level by automatically collecting notes based on criteria you define.
- Creating Smart Folders:
- In the Notes sidebar, tap the “New Folder” icon.
- Select “New Smart Folder.”
- Choose your desired filters:
- Tags: Include or exclude specific tags.
- Date Created/Edited: Notes from “Last 7 Days,” “Today,” etc.
- Attachments: Notes containing photos, scans, drawings, links.
- Checklists: Notes with checklists (checked or unchecked items).
- Shared: Notes that are shared with others.
- Locked: Notes that are password-protected.
- Example Use Cases:
- A “Today’s Tasks” Smart Folder that shows all notes created or edited today that contain checklists.
- A “Research” Smart Folder that collects all notes tagged
#researchand containing links. - A “Follow-Up” Smart Folder for all notes tagged
#followupand containing unchecked checklist items.
By combining folders, tags, and Smart Folders, you can create an incredibly powerful and flexible system for managing all your information, ensuring your checklists are always part of a larger, well-organized ecosystem. This is essential for anyone looking to master Digital Detox by having a clear, organized digital space.
🛍️ Gear Up: Essential Accessories for the Power Note-Taker
Even the most brilliant note-taking strategies can be enhanced with the right tools. At Daily Checklist™, we believe in investing in accessories that genuinely boost your productivity and make your digital life smoother. Here are our top picks for the serious Apple Notes user.
7.1. Apple Pencil (2nd Gen or USB-C): The Digital Quill
For those who love the tactile feel of pen on paper, the Apple Pencil transforms your iPad into an unparalleled digital notebook. It’s not just for artists; it’s a game-changer for annotating PDFs, sketching out ideas, and, yes, even handwriting your checklists.
Rating Table: Apple Pencil (2nd Gen)
| Aspect | Rating (1-10) |
|---|---|
| Design | 10 |
| Functionality | 10 |
| Precision | 10 |
| Comfort | 9 |
| Value | 8 |
- Features & Benefits:
- Pixel-Perfect Precision: Incredibly low latency makes writing and drawing feel natural.
- Pressure and Tilt Sensitivity: Allows for varied line weights and shading.
- Double-Tap Gesture: Quickly switch between tools (e.g., pen and eraser) in apps like Apple Notes.
- Magnetic Attachment & Charging: (2nd Gen only) Snaps magnetically to the side of compatible iPads for charging and storage.
- Universal Compatibility: (USB-C) Works with a wider range of iPads, offering a more budget-friendly option.
- Drawbacks:
- Price: It’s an investment, especially the 2nd Gen.
- Compatibility: Specific generations only work with specific iPad models.
- Our Take: If you own a compatible iPad and frequently use Notes for sketching, diagramming, or simply prefer handwriting, the Apple Pencil is an indispensable tool. It bridges the gap between digital convenience and analog comfort.
👉 Shop Apple Pencil on:
- Apple Pencil (2nd Gen): Amazon | Walmart | Apple Official Website
- Apple Pencil (USB-C): Amazon | Walmart | Apple Official Website
7.2. Paperlike Screen Protector: The Tactile Touch
If you’re using an Apple Pencil with your iPad, the Paperlike screen protector is a must-have. It’s designed to mimic the feel of writing on paper, adding a subtle friction that enhances control and reduces the “slippery” feel of glass.
Rating Table: Paperlike Screen Protector
| Aspect | Rating (1-10) |
|---|---|
| Design | 9 |
| Functionality | 9 |
| Feel | 10 |
| Clarity | 7 |
| Value | 8 |
- Features & Benefits:
- Paper-like Texture: Provides resistance for a more natural writing and drawing experience.
- Anti-Glare: Reduces reflections, making it easier to work in bright environments.
- Fingerprint Resistance: Helps keep your screen cleaner.
- Drawbacks:
- Slightly Reduces Screen Clarity: The matte finish can make the screen appear slightly less vibrant.
- Wears Down Pencil Nibs: The textured surface can cause Apple Pencil tips to wear out faster.
- Our Take: For anyone who uses their iPad and Apple Pencil extensively for note-taking or sketching, the Paperlike is a worthwhile investment. The improved tactile feedback makes a significant difference in comfort and precision.
👉 Shop Paperlike on:
- Paperlike Screen Protector: Amazon | Paperlike Official Website
7.3. Logitech MX Master 3S Mouse: Desktop Precision
For those who spend hours organizing notes and managing checklists on their MacBook Pro or iMac, a high-quality mouse is crucial. The Logitech MX Master 3S is a favorite among productivity enthusiasts.
Rating Table: Logitech MX Master 3S
| Aspect | Rating (1-10) |
|---|---|
| Design | 9 |
| Functionality | 10 |
| Comfort | 10 |
| Precision | 10 |
| Value | 9 |
- Features & Benefits:
- Ergonomic Design: Sculpted for comfort during long work sessions.
- MagSpeed Scroll Wheel: Incredibly fast and precise scrolling, perfect for navigating long notes and folders.
- Customizable Buttons: Program buttons for specific actions in Notes (e.g., create new note, search, switch between folders).
- Darkfield Tracking: Works on virtually any surface, including glass.
- Multi-Device Connectivity: Seamlessly switch between up to three devices.
- Drawbacks:
- Price: It’s a premium mouse.
- Size: Might be too large for users with very small hands.
- Our Take: If you’re serious about desktop productivity and want to make your Mac Notes experience as smooth and efficient as possible, the MX Master 3S is an excellent choice. Its precision and customizable features make navigating and organizing a breeze.
👉 Shop Logitech MX Master 3S on:
- Logitech MX Master 3S: Amazon | Best Buy | Logitech Official Website
📱 Maximize Your Mobile Experience: iPhone and iPad Tips
Your iPhone and iPad are more than just communication devices; they’re powerful productivity hubs, especially when it comes to managing your Daily Checklists. Beyond the core Notes app features, there are several iOS and iPadOS tricks that can elevate your note-taking game.
8.1. Widgets Are Your Window to Productivity
Widgets on your Home Screen or Today View offer glanceable information and quick access to your most important notes.
- Adding the Notes Widget:
- Long-press on an empty area of your Home Screen until apps jiggle.
- Tap the “+” icon in the top left corner.
- Search for “Notes” and select the widget size you prefer.
- Tap “Add Widget.”
- Customizing Your Widget: After adding, you can often long-press the widget itself and tap “Edit Widget” to choose which note or folder it displays (e.g., your “Grocery List” or “Daily To-Do” Smart Folder).
- Benefit: See your most urgent checklist items without even opening the Notes app. This is a fantastic Morning Routine booster!
8.2. Control Center Shortcut: Instant Note Creation
Need to jot something down right now? The Control Center is your fastest route to a new note.
- Adding Notes to Control Center:
- Go to Settings > Control Center.
- Scroll down to “More Controls” and tap the “+” icon next to “Notes.”
- Using the Shortcut: Swipe down from the top-right corner of your screen (or up from the bottom on older iPhones) to open Control Center. Tap the Notes icon to instantly create a new note. You can even long-press the icon to choose “New Note,” “New Checklist,” “New Photo,” or “Scan Document.” ✅
8.3. Haptic Touch (Long-Press) for Quick Actions
Don’t underestimate the power of a long-press on the Notes app icon.
- Quick Actions: Long-press the Notes app icon on your Home Screen to reveal a menu of quick actions: “New Note,” “New Checklist,” “New Photo,” and “Scan Document.”
- Benefit: Skip opening the app and navigating. Jump straight to creating the type of note you need.
8.4. Quick Note on iPad: The Ultimate Multi-Tasker
For iPad users, Quick Note is a revelation for capturing ideas without interrupting your workflow.
- How to Use Quick Note:
- Swipe up from the bottom-right corner of your iPad screen with your finger or Apple Pencil. A small Quick Note window will appear.
- Jot down your thoughts, add links from Safari, or create a quick checklist.
- Swipe it away when done; it saves automatically to a dedicated “Quick Notes” folder in the Notes app.
- Benefit: Seamlessly capture information while browsing, watching videos, or working in other apps, without losing your place.
8.5. Drag and Drop Between Apps
Both iPhone and iPad support drag-and-drop, making it easy to move content into Notes.
- Example: Open Safari and Notes in Split View on your iPad. Drag a link or an image directly from Safari into your note. On iPhone, you can often drag content from one app to Notes by holding the item, then swiping up to the Home Screen and opening Notes.
- Benefit: Quickly gather research, images, or links into your notes, enriching your checklists with relevant information.
By integrating these iOS and iPadOS features into your daily routine, you’ll find that managing your checklists and notes becomes not just efficient, but genuinely enjoyable.
🎧 Tune In and Focus: AirPods and Audio for Deep Work
Sometimes, the biggest obstacle to tackling your Daily Checklists isn’t the list itself, but the cacophony of the world around you. Whether you’re trying to focus in a bustling coffee shop or just drown out the household chatter, the right audio gear can create your personal productivity bubble. At Daily Checklist™, we’ve found that a focused mind is a productive mind, and Apple AirPods are often our secret weapon.
9.1. AirPods Pro (2nd Gen): Your Personal Sound Sanctuary
The AirPods Pro (2nd Gen) are more than just headphones; they’re a gateway to deep work. Their advanced noise cancellation can transform any environment into a quiet haven, perfect for concentrating on your notes and tasks.
Rating Table: AirPods Pro (2nd Gen)
| Aspect | Rating (1-10) |
|---|---|
| Design | 9 |
| Sound Quality | 9 |
| Noise Cancellation | 10 |
| Comfort | 9 |
| Value | 9 |
- Features & Benefits:
- Active Noise Cancellation (ANC): Dramatically reduces external noise, allowing you to focus without distractions. This is a game-changer for Digital Detox by creating a focused environment.
- Adaptive Transparency: Lets in important sounds (like announcements or conversations) while still reducing harsh noise, so you stay aware of your surroundings when needed.
- Spatial Audio: Immersive sound experience, great for music or podcasts that help you concentrate.
- Seamless Apple Ecosystem Integration: Instant pairing, automatic switching between devices, and “Hey Siri” support.
- Long Battery Life: Up to 6 hours of listening time with ANC, and up to 30 hours with the charging case.
- Drawbacks:
- Price: They are a premium audio product.
- In-Ear Fit: While comfortable for most, some users prefer over-ear headphones.
- Our Take: If you frequently find yourself needing to block out distractions to focus on complex tasks, organize extensive notes, or simply enjoy some calming background music while working through your checklists, the AirPods Pro (2nd Gen) are an outstanding investment. Their noise cancellation is industry-leading, creating an unparalleled environment for concentration.
👉 Shop AirPods Pro (2nd Gen) on:
- AirPods Pro (2nd Gen): Amazon | Walmart | Apple Official Website
9.2. iPhone’s Built-in Background Sounds: Your Free Focus Tool
You don’t always need fancy headphones to create a calming audio environment. Your iPhone has a hidden gem: Background Sounds.
- What it is: A feature that plays ambient sounds (like ocean waves, rain, or white noise) to help you focus or relax.
- How to Enable:
- Go to Settings > Accessibility > Audio/Visual.
- Tap “Background Sounds.”
- Toggle it “On.”
- Choose your preferred sound and adjust the volume.
- Pro Tip: You can also add a shortcut to Background Sounds in your Control Center for quick access.
- Benefit: A free, effective way to mask distracting noises and create a consistent audio backdrop for deep work, perfect for tackling those detailed checklists without external interruptions.
Whether you’re investing in top-tier noise-canceling earbuds or simply utilizing your iPhone’s built-in features, creating an optimal audio environment is a powerful strategy for enhancing focus and productivity when managing your digital life.
🆘 Expert Support: Getting the Most from the Apple Ecosystem
Even the most seasoned Daily Checklist™ planners sometimes hit a snag. The Apple ecosystem, while generally seamless, can occasionally present challenges, especially when it comes to syncing, software updates, or understanding new features. Knowing where to turn for reliable support is crucial for maintaining your productivity flow.
10.1. Apple’s Official Support Channels: Your First Stop
Apple provides a wealth of resources to help you troubleshoot and master your devices.
- Apple Support Website: This is your go-to for articles, guides, and troubleshooting steps for every Apple product and service. If you’re having issues with iCloud syncing your Notes, for example, a quick search here will likely provide the solution. Visit Apple Support
- Apple Support App: Available on the App Store, this app provides personalized support, allows you to chat with an Apple expert, schedule a call, or find nearby service locations. It’s incredibly convenient for on-the-go assistance.
- Apple Support YouTube Channel: For visual learners, Apple’s official YouTube channel offers excellent video tutorials on how to use various features, including new iOS updates and app functionalities. Watching a quick video can often clarify complex steps.
- Apple Community Forums: These forums are a treasure trove of user-generated solutions and discussions. Often, if you’re experiencing an issue, someone else has already found a fix. This is where we found valuable insights into the “Sort Checked Items” feature’s nuances! Visit Apple Discussions
10.2. iCloud Storage: The Unsung Hero of Syncing
One of the most common reasons for syncing issues across your Apple devices (including Notes) is insufficient iCloud Storage. If your iCloud is full, new data (like changes to your notes) might not sync properly.
- Check Your iCloud Storage:
- Go to Settings > [Your Name] > iCloud.
- You’ll see a bar indicating your storage usage.
- Manage Your Storage:
- Tap “Manage Account Storage” (or “Manage Storage” on older iOS versions).
- Here, you can see which apps are using the most space. You might find old backups, photos, or documents consuming valuable gigabytes.
- Upgrade if Needed: If you’re consistently running out of space, consider upgrading your iCloud storage plan. Apple offers affordable tiers, and the peace of mind knowing your data is backed up and synced is well worth it. ☁️
10.3. AppleCare: Peace of Mind for Your Ecosystem
For those who rely heavily on their Apple devices for productivity, AppleCare+ can be a worthwhile investment.
- What it Offers: Extends your warranty coverage and provides expert technical support, including accidental damage protection.
- Benefit: If your iPhone or iPad experiences a hardware issue that impacts your ability to use Notes or other productivity apps, AppleCare+ can save you from costly repairs and get you back to your Morning Routines faster.
Remember, you’re not alone in navigating the digital landscape. Apple’s robust support system is designed to help you get the most out of your devices and keep your productivity flowing smoothly.
🤔 Frequently Asked Questions: Solving the Checklist Mystery
We’ve covered a lot of ground, from the history of Apple Notes to advanced organization techniques. But some questions pop up again and again, like that one stubborn item you keep forgetting to add to your grocery list. Let’s tackle the most common queries about the “move to bottom” feature and related checklist mysteries.
Q1: Can I move checked items to the bottom on a specific note only?
A: Unfortunately, no. This is a common wish, but Apple’s current implementation of “Sort Checked Items” is a global setting. As one user on Apple Discussions clearly stated, “It’s a global setting for the notes app and every note.” Source: Apple Discussions. Once you enable “Automatically” in your Notes settings, it applies to all checklists in all your notes. There’s no per-note toggle. It’s an “all or nothing” deal! ❌
Q2: Does this feature work on the web version of iCloud Notes?
A: Yes, it does! If you log into iCloud.com on a web browser and access your Notes, the behavior of your checklists will respect the “Sort Checked Items” setting you’ve established on your iPhone, iPad, or Mac. This means your completed tasks will automatically move to the bottom, maintaining consistency across your entire Apple ecosystem. It’s a testament to iCloud’s robust syncing capabilities.
Q3: Why did my checklist items disappear when I checked them?
A: They almost certainly didn’t disappear! If you have a very long checklist, the checked items simply zoomed to the very bottom of the list. It’s a common initial reaction to think they’ve vanished, especially if you’re new to the “Automatically” setting. Just scroll down, and you’ll find them patiently waiting there, marked as complete. 🕵️ ♀️ It’s like a digital “out of sight, out of mind” for completed tasks.
Q4: I heard this feature isn’t available on Mac. Is that true?
A: This is a point of frequent confusion, and we’ve seen conflicting information in user forums. Let’s clarify:
- The “Automatically sort checked items” setting is available in Apple Notes on macOS. You can find it under Notes > Settings (or Preferences) > “Sort checked items automatically.”
- The confusion likely stems from a few sources:
- Older macOS versions: The feature might not have been present in very old versions of macOS.
- Default behavior: Some users might have expected it to be on by default, as it sometimes feels more intuitive for a desktop app.
- Comparison to other apps: As noted in the Bear app community, other note-taking apps on Mac might offer a manual “move done to bottom” command rather than an automatic preference. “Bear for Mac has a ‘move done to bottom’ option for checklists, which helps organize completed tasks. This feature is manual on Mac…” Source: Bear Community. This highlights that different apps have different implementations.
Our Expert Take: Rest assured, if your macOS is up to date, you can enable automatic sorting for your checklists in Apple Notes on your Mac, just like on your iPhone and iPad. The Apple ecosystem strives for consistency, even if the path to a setting might differ slightly between platforms.
Q5: Can I recover a checked item that I accidentally moved to the bottom?
A: Absolutely! Checking an item doesn’t delete it. If you accidentally checked something and it moved to the bottom, simply scroll down, find the item, and tap the checkbox again to uncheck it. It will instantly jump back to its original position in the active part of your list. No need to panic! ↩️
These FAQs cover the most common hurdles users face. By understanding these nuances, you’re well on your way to becoming a true Apple Notes checklist master!
Conclusion
So, there you have it — the definitive guide to mastering the iPhone Notes checklist move to bottom feature and beyond! From the humble beginnings of Apple Notes as a simple yellow pad to today’s powerhouse app with automatic sorting, tagging, and rich media support, Apple has truly transformed the way we organize our lives digitally.
The “Sort Checked Items” feature is a deceptively simple toggle that can revolutionize your productivity by decluttering your checklists and keeping your focus razor-sharp. Whether you choose to enable it globally or prefer manual control, understanding how it works across your iPhone, iPad, and Mac ensures you’re never lost in a sea of completed tasks.
We also cleared up the confusion about Mac vs. iOS availability — yes, the feature is available on both platforms, but the implementation and default behaviors have evolved over time, which explains the mixed user experiences. And if your checklist isn’t moving as expected, the troubleshooting tips will have you back on track in no time.
Beyond just moving checked items, we explored powerful organizational tools like folders, tags, and Smart Folders, plus productivity hacks like Siri integration, Quick Notes, and the magic of Apple Pencil and accessories. And for those moments when focus is elusive, the AirPods Pro and iPhone’s background sounds have your back.
Our confident recommendation:
If you’re an Apple user looking to simplify your daily planning and boost productivity, embracing the Notes app with the “Sort Checked Items” feature enabled is a no-brainer. Pair it with smart organization strategies and the right accessories, and you’ll wonder how you ever managed without it.
Ready to transform your digital checklists into a streamlined productivity machine? Let’s get those tasks moving — literally! ✅
Recommended Links
Ready to gear up and optimize your Apple Notes experience? Here are some top picks and resources to help you on your journey:
-
Apple Pencil (2nd Gen):
Amazon | Walmart | Apple Official Website -
Apple Pencil (USB-C):
Amazon | Walmart | Apple Official Website -
Paperlike Screen Protector:
Amazon | Paperlike Official Website -
Logitech MX Master 3S Mouse:
Amazon | Best Buy | Logitech Official Website -
AirPods Pro (2nd Gen):
Amazon | Walmart | Apple Official Website -
Books on Productivity and Checklist Mastery:
🤔 Frequently Asked Questions
What are tips for managing daily checklists on iPhone Notes?
Managing daily checklists effectively involves a combination of using built-in features and smart habits:
- Enable “Sort Checked Items” Automatically: This keeps your completed tasks out of sight, reducing clutter.
- Use Indentation: Create sub-tasks by indenting items for better hierarchy and clarity.
- Leverage Siri: Add items hands-free to your notes, speeding up list creation.
- Organize with Folders and Tags: Group related notes and use tags for cross-referencing.
- Use Widgets: Add the Notes widget to your Home Screen for quick access to your most important lists.
- Regularly Review and Archive: Periodically clean out old notes to keep your workspace fresh.
These tips help maintain focus and prevent your checklist from becoming overwhelming.
Is there a way to organize my iPhone Notes checklist for better productivity?
Absolutely! Beyond just checklists, Apple Notes offers powerful organizational tools:
- Folders: Create folders and subfolders to categorize notes by project or theme.
- Tags: Use hashtags within notes to dynamically group related content across folders.
- Smart Folders: Automatically collect notes based on tags, dates, or content types.
- Lock Sensitive Notes: Protect private checklists with Face ID or a password.
- Use Quick Notes and Scan Documents: Capture ideas on the fly and add scanned documents to your notes for richer context.
Combining these features creates a personalized, efficient system tailored to your workflow.
Can I move completed checklist items to the bottom in iPhone Notes?
Yes! By enabling the “Sort Checked Items” feature in your iPhone’s Settings under Notes > Sort Checked Items, you can have completed checklist items automatically move to the bottom of your lists. This setting applies globally to all notes and syncs across devices via iCloud.
How do I reorder checklist items in iPhone Notes?
You can reorder checklist items by:
- Dragging and Dropping: Tap and hold the “handle” (three horizontal lines) next to an item and drag it to your desired position.
- Indentation: Swipe right on an item to indent it, creating sub-tasks, or swipe left to outdent.
- Unchecking Items: Uncheck and re-check items to trigger repositioning if “Sort Checked Items” is enabled.
This flexibility allows you to customize your checklist order as needed.
How do I move checked items to the bottom automatically on my iPhone Notes?
To automatically move checked items to the bottom:
- Open Settings on your iPhone.
- Scroll down and tap Notes.
- Tap Sort Checked Items under the Viewing section.
- Select Automatically.
Once enabled, any item you check off will instantly move to the bottom of its checklist.
How do I sort checklist in Apple Notes app?
Apple Notes offers two main sorting options for checklists:
- Automatic Sorting: Moves checked items to the bottom automatically (enabled via Settings).
- Manual Sorting: Keeps items in the order you set, regardless of checked status.
On Mac, you can enable automatic sorting in Notes > Preferences. On iPhone/iPad, it’s in the device’s Settings app under Notes.
How to stop checked items in Notes from going to the bottom of page?
If you prefer checked items to stay where they are:
- Go to Settings > Notes > Sort Checked Items.
- Select Manually instead of Automatically.
This keeps your checklist items in their original order, regardless of completion status.
Can you rearrange order of Notes on iPhone?
Yes! You can rearrange notes within folders by:
- Manual Drag and Drop: Tap and hold a note in the list, then drag it to a new position.
- Sorting Options: Tap the three-dot menu in the folder view and select sorting by Date Edited, Date Created, or Title.
This helps keep your notes organized in a way that suits your workflow.
How do I reorder items in an iPhone Notes checklist?
Reordering checklist items is straightforward:
- Tap and hold the handle (three horizontal lines) next to the checklist item.
- Drag the item up or down to the desired position.
- Release to drop it in place.
This works regardless of whether items are checked or unchecked.
What is the easiest way to organize my iPhone Notes checklist?
The easiest way combines a few simple habits:
- Enable Automatic Sorting for checked items to keep your list clean.
- Use Indentation to create sub-tasks and group related items.
- Organize notes into folders and use tags for cross-referencing.
- Regularly review and archive completed notes.
This approach keeps your checklists manageable and your productivity high.
Are there shortcuts to manage checklists efficiently on iPhone Notes?
Yes! Here are some handy shortcuts:
- Long-press the Notes app icon on the Home Screen to quickly create a new note or checklist.
- Use Siri to add checklist items hands-free.
- Add the Notes widget for quick access to recent notes.
- Use Swipe Gestures: Swipe right to indent, left to outdent checklist items.
- Use Drag and Drop to reorder items quickly.
Mastering these shortcuts saves time and keeps your workflow smooth.
Reference Links
- Apple Support: Use Checklists in Notes
- Apple Support: Additional Tips on Sorting in Notes
- Apple Official Website
- Apple Discussions: Moving Checked Items to Bottom
- Apple Discussions: Stop Checked Items Moving
- Bear Community: Why is “Move Done to Bottom” Available on Mac but Not iOS?
- Logitech Official Website
- Paperlike Official Website
- Amazon Product Search: Apple Pencil
- Amazon Product Search: AirPods Pro
- Amazon Product Search: Logitech MX Master 3S